How to share VPN in Windows 7 using Wi-Fi
Just follow steps bellow.
Step 1: Set up your laptop to be like a WiFi router.
- Open Command Prompt with elevate privilege.
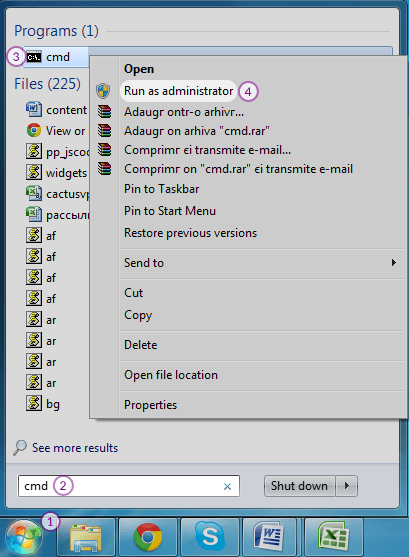
- Click the Start button (1).
- In the search box (2), type: cmd
- In
the list of results, right-click “cmd” (3), and then click “Run as
administrator” (4). If you’re prompted for an administrator password or
confirmation, type the password or provide confirmation.
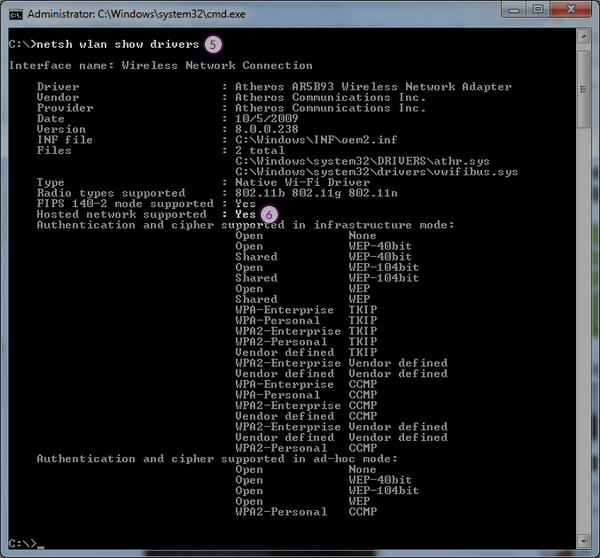
- Verify if necessary drivers are installed:
- Type in Command Prompt (5): netsh wlan show drivers
- press
“Enter”. If next to “Hosted Network Supported” is written “Yes” (6)
then everything is ok and you can go to next step. If it says “No” then
you have to install drivers for it.
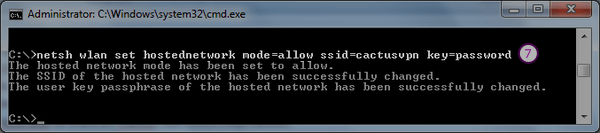
- Create a WiFi network with SSID = cactusvpn and password = password:
Type in Command Prompt (7): netsh wlan set hostednetwork mode=allow ssid=cactusvpn key=password
- Start your Wi-Fi network:
Type in Command Prompt (8): netsh wlan start hostednetwork
You should receive the following result:

If
you see the message “hosted network couldn’t be started”, then your
WiFi driver is outdated. Update necessary drivers, running Windows
Update or downloading the latest version from official website.
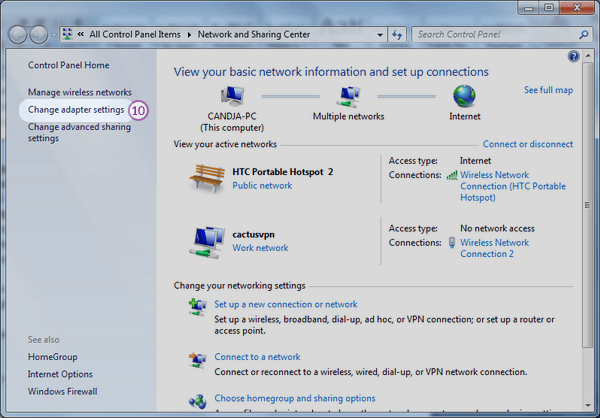
- Share the Wi-Fi connection:
- Go to “Open Network and Sharing Center” by right-clicking your WiFi icon (9) from the right bottom corner of your screen.

- Go to “Change adapter settings” (10).
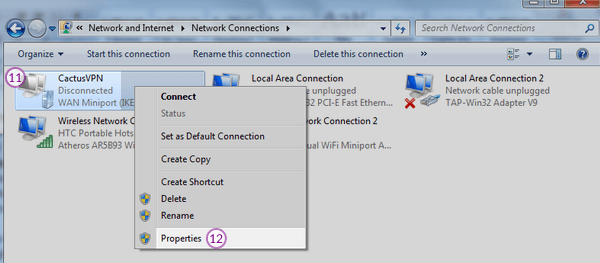
- Right-click
on the VPN connection you’ve created previously (11) and go to
“Properties” (12). Remember the name of the new connection created. You
will need it in the next step.
- Go
to “Sharing” tab (13) and check on the checkbox next to “Allow Other
Network User to connect through this computer’s Internet connection”
(14) and next to “Allow other network users to control or disable the
shared Internet connection” (15). On “Home Network Connection” select
the connection you’ve just created.

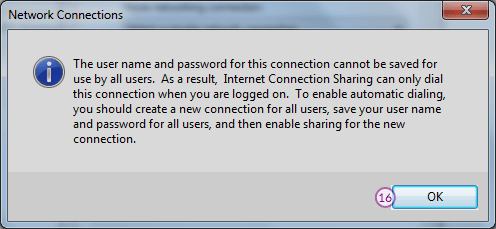
- Click “OK” (16) on the next window.
Step 2: Connect to VPN
- Connect to CactusVPN server from your laptop.
- Use the new created “cactusvpn” WiFi connection from your SPS, PSP, Xbox or AppleTV.
Please
remember, your Shared WiFi connection will be disabled every time you
shut down or restart your computer so, if you want to start the network
again just type in command line: netsh wlan start hostednetwork


Comments